VSCode+CubeMX开发STM32笔记-Uart串口使用
使用VSCode+CubeMx开发STM32,这里介绍Uart串口的基本使用;
1.建立工程
1.1 创建项目文件
从已有的仓库中创建一个工程:
1 | git clone https://github.com/makerinchina-iot/vscode_stm32cubemx_hello.git uart |
使用VSCode打开工程后,需要更改如下名字:
- 文件夹根目录下CMakeLists.txt 文件中修改工程名字为uart:
1 | set(CMAKE_PROJECT_NAME uart) |
- stm32cubemx配置文件更改为 uart.ioc ,并更改以下文件名:
1 | ... |
1.2 引脚配置
使用STM32CubeMx打开ioc配置文件,然后配置对应的串口引脚;
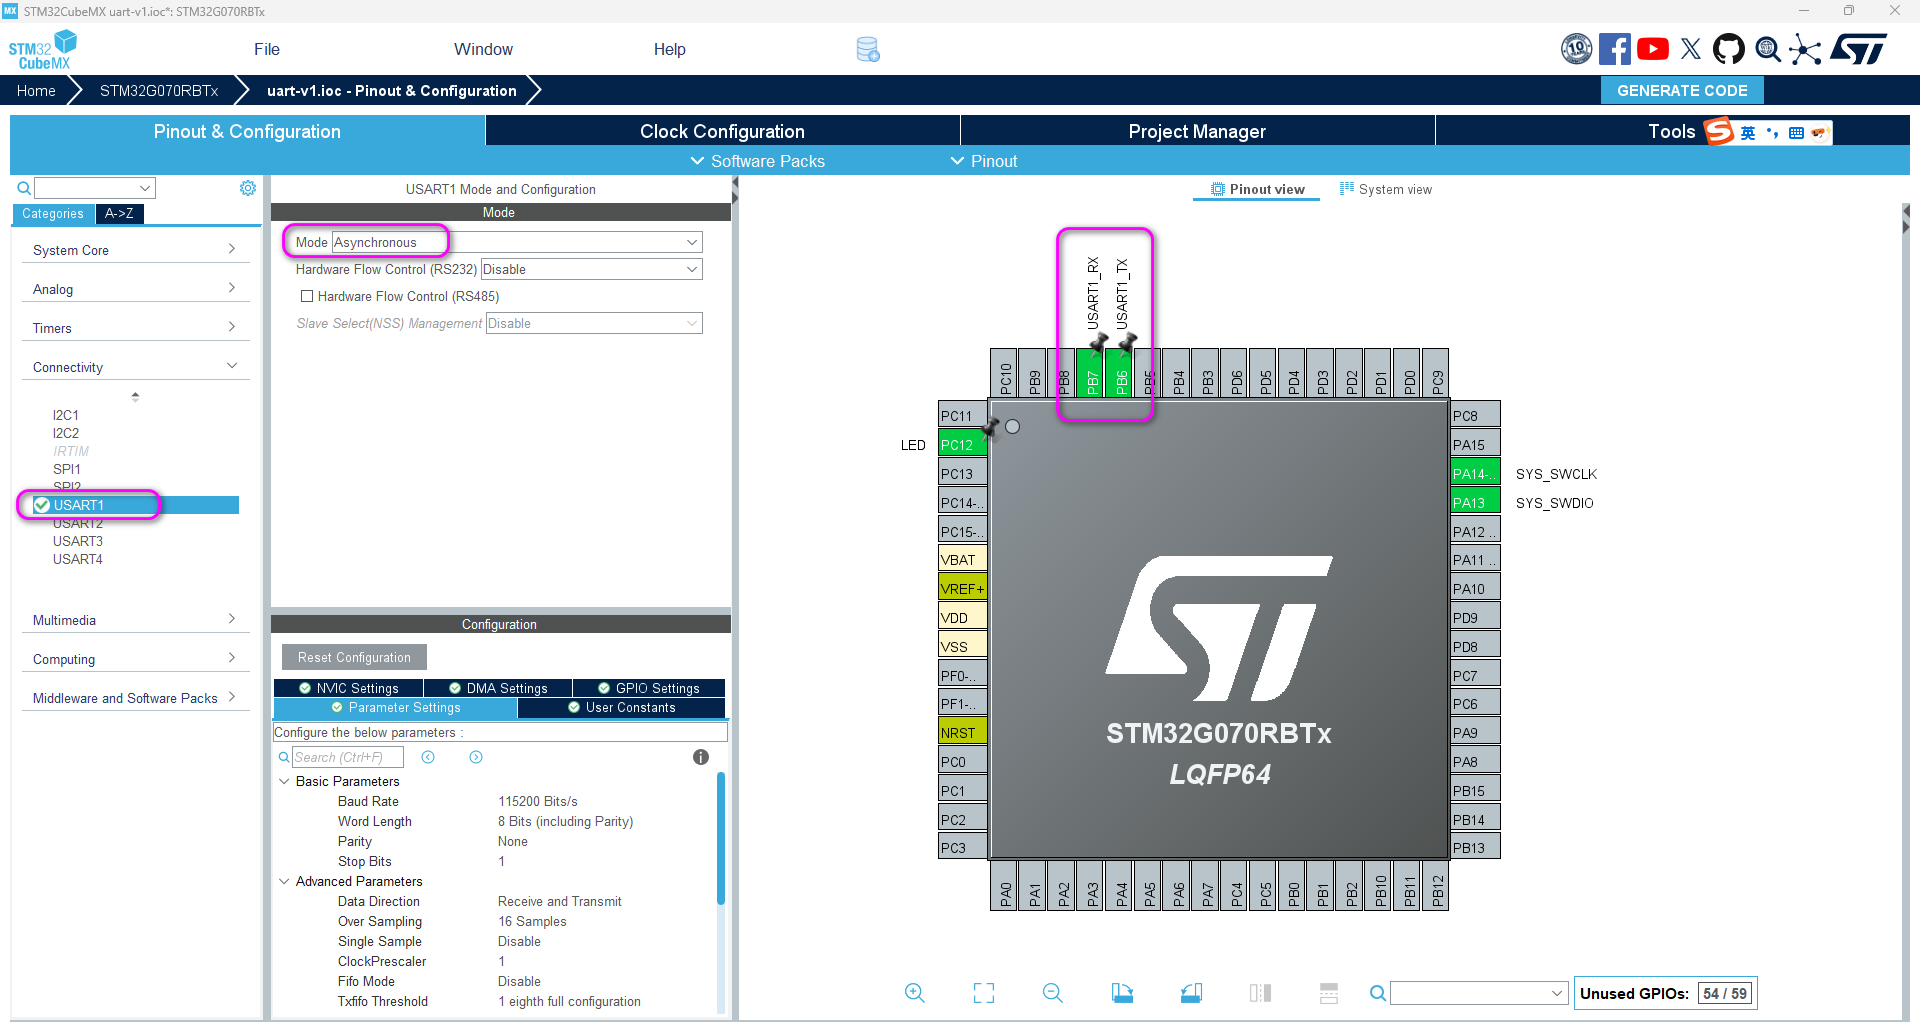
- 对于MonkeyPi-STM32G070RB-V1版本,板载usb转串口连接的的是uart1,因此配置如引脚:

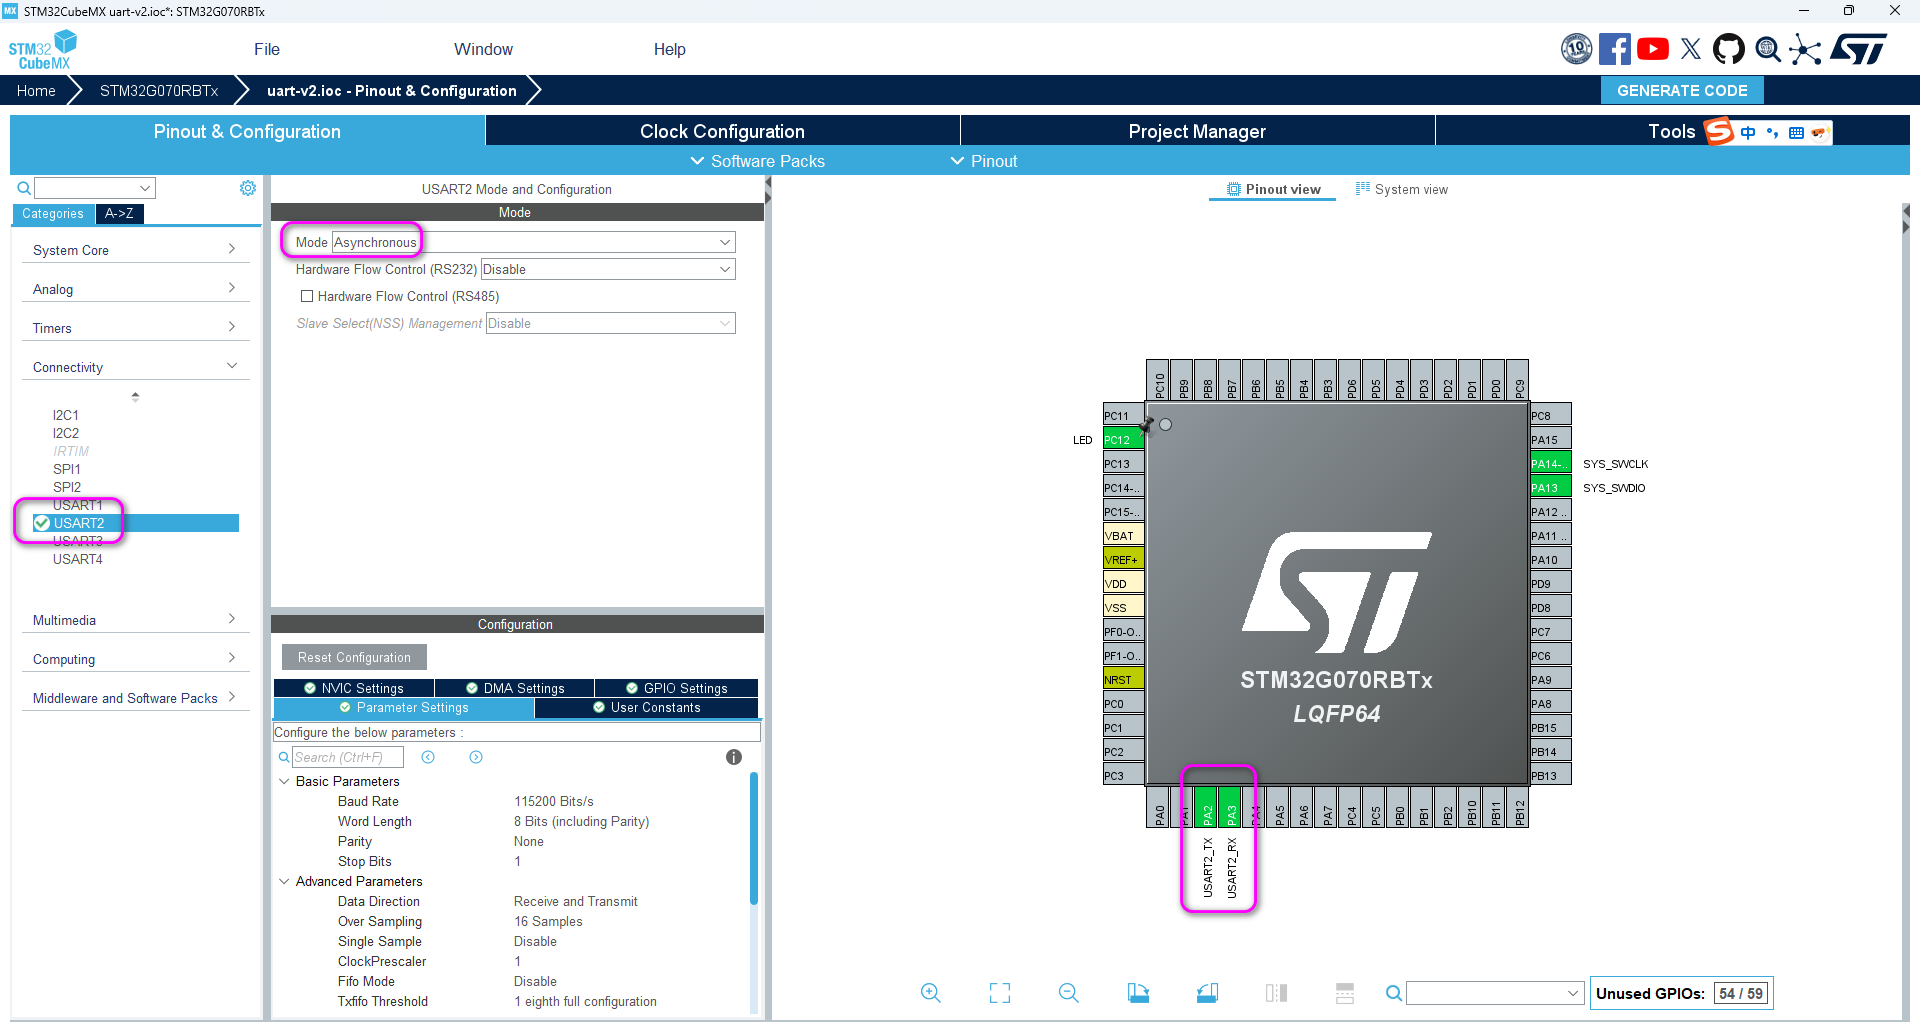
- 对于MonkeyPi-STM32G070RB-V2版本,板载USB转串口连接的是UART2,因此配置引脚如下:

2. 编写代码
在main中添加如下代码:
1 | while (1) { |
如果是V2版本则将 huart1 改为 huart2;
3.编译并烧录代码
点击生成按键即可编译工程;
在VSCode中执行task:openocd-flash烧录;
最后可以看到串口打印信息:

著作权归本网站(https://makerinchina.cn)所有,转载请注明来自 MakerInChina.


